6.29.2010

Sweet Chili Lime Tofu with Collard Greens and Quinoa

John got an Apple gift card for his birthday and bought an iPod.

=>

John's iPod touch has a lot of free foodie apps, including one from Vegan Yum Yum.

=>

That is how we found this particular recipe.
That's the whole story. Thanks for coming!


It definitely tasted better than it looked, but this dish didn't wow me the way I expected it to. I think part of the problem was that we pressed the tofu - usually a very good idea. In this case, the recipe kind of depends on the tofu having moisture left when you put it into a dry cast iron pan. It kind of stuck all over the pan, though in the end, it still tasted awesome.
My complaints are pretty petty in general here; the quinoa with lime zest tasted pretty great, and the collards complimented the whole thing really well. I guess I feel like it took kind of a while to prepare, when maybe similar vegan (and non-vegan) stuff I've made has been just as good and taken less time.

Still, I'm glad we made this. I feel like it includes a lot of different food groups and tastes pretty good. After typing that I feel like I was picky in the previous paragraph.


I didn't get a good shot before we tore into it, but I promise this tastes better than it looks.


Instead of posting the whole recipe, I'll just send you to the blog itself, so you can see her step-by-step pictures. I'd really recommend giving this recipe a try.

Sweet Chili Lime Tofu with Collard Greens and Quinoa.

6.28.2010

Cake Decorating

**Note:** this post is pretty much about cake decorating. I wrote it partly to share with you, and partly for myself, to have a record of a cake that went right. If you have no interest in cake decorating, you may want to come back later.


This week my church choir had a party and we were instructed to bring either dessert or a salad.
While I feel like I've learned to love salad in a new way since leaning vegetarian, I can't pass up the chance to make dessert - especially when it's going to leave my house. I cut up the left overs and put them on other people's plates so we didn't take any home.


Exhibit A.
This is a "pink" velvet cake, pink because I was out of red food coloring. The recipe (found here)was from the Martha Stewart Cupcakes book. I've used it to make two 9" round cakes in the past, which is why I did that again. I'm not sure that every recipe works this way, but I trust this one as cupcakes or cakes.
When we cut into it, the color was so dark that it looked red anyways, and people asked me if it was strawberry. Like cornbread, red velvet cake seems like one of those things some Canadians know all about while others have never heard of it. The reviews were positive, and I think I spread the good news of red velvet cake to a few people.


I wanted to share a couple of things I've learned about cake decorating over the past year. My knowledge is by no means extensive, but I've got a few tips for people who can't bake like Brown Eyed Baker but still want to make a nice looking cake.

Returning to Exhibit A, the icing still has a few uneven spots in it, and you can kind of see the lines from where I moved the spatula around. That said, it's pretty smooth, and those lines are a lot less noticeable to the naked eye. To make the cake smooth, I used these:


#1. An off-set spatula. This guy is good for smoothing out smaller areas and for the sides of this two-layer cake, since it's taller than the cake itself. I especially find this one helpful when I'm working on the edges along the top of the cake.


Note: clean enough to see my camera in its reflection.


#2. A bigger icing spatula. I've looked on the internet for its proper name, but "icing spatula" is what I've come up with so far. This guy is good for getting a massive amount of icing on the cake at once and for making big passes over the top of it, with as few lines as possible.


Speaking of icing, I have learned a couple of things that are helpful here.

First, make sure the cake has cooled completely. Like, really cooled. Once in the fall I was pressed for time and the whole was ruined because I tried to start icing it too soon. To expedite that process, stick the layers in the fridge. In general, another rule I've learned is that the fridge is your friend.

The next idea is from smittenkitchen.com. She recommends putting on a "crumb" layer of icing first. This isn't a neat looking layer, just a thin amount of icing to keep all the crumbs in place. Once that layer is on, put the whole thing back in the fridge for 10 or 15 minutes. Then, when you take it out, it's much easier to spread the room-temperature icing over it and make the whole thing smoother.


The last stage of decorating this behemoth was the piping. I'm not exactly a piping whiz or anything (see also, here), but it's something I've learned to do over time from watching other people.* My approach to this cake was "keep it simple," since once piping seems to be going well, I tend to go over board and pipe myself crazy.
Part of the purpose of the piping here was to clean up the edges of the cake and the rim on the bottom. I just added a wavy shape to the bottom and little star shapes to the top, both with the same tip.


I used this piping bag (above) from the Martha Stewart kit I have. You can buy this type of thing at most craft stores, Bulk Barn, or do it the Alton Brown way and just cut a hole in a ziplock bag (though the environment won't thank you). My only tip here is to roll down the sides of the bag so that you can put the icing in as close to the tip as possible. Now that I know to do that it seems extremely obvious, but it took me a long time to get here. The story of my life.


I chose this tip because of the similar shape it had to one in the Martha Stewart Cupcake book. In the back of the book she included this helpful page:


The tips don't match exactly to those in the kit, but it's close enough to be helpful.

And so, the finished product, Exhibit B.


The rings of piping are a little inconsistent, but it's way better than my previous two attempts.


As you can see, I had enough time on my hands this week to bake a fairly large, elaborate cake, and then write a long blog post about it. Our summer reading club starts this week, and my weird class scheduling situation for the fall mandates that I get a lot of reading done this summer. So who knows if there will be more fancy cakes. That's kind of the great thing about summer, though - you can study for three or four hours and still have a lot of the day left to bake cakes or go to the beach, instead of doing more homework or grading papers.


*TV.

6.26.2010

Chinese Sesame "Kale" and Ginger Soy Tofu

This meal was a weird yin-yang of excellence paired with failure.


The sesame "kale" was the failure, so I'll cover that first. Several things went wrong and they all contributed to the general nastiness.
#1 - It froze in our fridge. Apparently the temperature was up too high (or "down too low?" Linguistic puzzle).
#2 - It wasn't kale (hence the quotes). It was Swiss chard, because that's all we could find.
#3 - We probably should have cut the leafy pieces off of the thick stem in the center of each leaf. These were especially gummy and tough when they defrosted.

The preparation seemed really great, though, and I'd like to give it another try. Here's a link to the recipe. Click here!


The real star of this meal turned out to be the tofu. I used a really simple marinade from the interwebs and just let the tofu sit in it for about an hour before pan frying it. It's some of the best tofu I've ever made and I will definitely make it again.


Ginger Sesame Marinade
from Real Simple

Ingredients

  • 1/4 cup low-sodium soy sauce
  • 1 tablespoon grated ginger
  • 1 tablespoon sesame oil
  • 2 scallions, thinly sliced (I omitted and subbed a clove of garlic)
  • 1/4 teaspoon crushed red pepper

Directions

  1. Combine the ingredients in a large resealable plastic bag, a shallow bowl, or a baking dish.
  2. Add 2 pounds of poultry, meat, seafood, or vegetables (or one package of tofu) and refrigerate, covered, at least 20 minutes and up to overnight. (For fish and scallops, marinate for no more than 15 minutes or they may become mushy.)
  3. Turn the food occasionally so all surfaces are exposed to the marinade.
  4. Before cooking, remove the food from the container, shake off the excess liquid, and discard the marinade. (Always toss a marinade once you’ve soaked raw meat in it―the mixture may be contaminated with bacteria).*
  5. Cook on a lightly oiled grill to the desired doneness.

*Since I was just using tofu, I threw the extra marinade into the pan. The whole thing was a lot saucier that way.

Chocolate Chip Cookies

Some of you may have known that we had a few...dislikes about our neighbor, the woman who lived below us in our current apartment. Thankfully, she moved out while were gone! The new neighbors have brought a lot of changes to Barry Place, including free laundry for us.


As a way of thanking them for the laundry, getting things off on the right foot, and buying their children's love, we made them a whole bunch of chocolate chip cookies.

I searched around my saved recipes for a good chocolate chip cookie recipe, since I've never been that sold on one in particular. This recipe from Erin's Food Files came up and it looked perfect to me, as I prefer a cakey, thicker cookie. In reading the post I learned that Erin wasn't so wild about this recipe herself, but it really appealed to me, and it got rave reviews from everyone who ate them.


I think the recipe made about 3 dozen good sized cookies. I made the last two batches a little bigger in order to use the dough faster, so I probably could have made 5 or 6 more if I'd tried. If I ever make this for a smaller group of people I'll probably halve it, to keep from having cookies in the apartment...just...starting at me.


Chocolate Chip Cookies
from Erin's Food Files.

Ingredients:

2 1/4 cups all-purpose flour
1/2 teaspoon baking soda
1 cup (2 sticks) unsalted butter, room temperature
1/2 cup granulated sugar
1 cup packed light-brown sugar
1 teaspoon salt
2 teaspoons pure vanilla extract
2 large eggs
2 cups (about 12 ounces) semisweet and/or milk chocolate chips

Directions:

Preheat oven to 350 degrees. In a small bowl, whisk together the flour and baking soda; set aside. In the bowl of an electric mixer fitted with the paddle attachment, combine the butter with both sugars; beat on medium speed until light and fluffy. Reduce speed to low; add the salt, vanilla, and eggs. Beat until well mixed, about 1 minute. Add flour mixture; mix until just combined. Stir in the chocolate chips.

Drop heaping tablespoon-size balls of dough about 2 inches apart on baking sheets lined with parchment paper.

Bake until cookies are golden around the edges, but still soft in the center, 8 to 10 minutes. Remove from oven, and let cool on baking sheet 1 to 2 minutes. Transfer to a wire rack, and let cool completely. Store cookies in an airtight container at room temperature up to 1 week.

Chana Masala and Indian Style Cabbage

And....


we're back to food. That didn't take long, did it?


I can't say enough good things about this meal. I got the recipes from Kira's blog, and her observations were the same as mine for both dishes:
a) The chana masala is the easiest "Indian" thing we've ever made, and it tastes awesome.
b) The original title of the cabbage is "five-minute Indian-style cabbage," and that timing is correct. In 5 minutes we had the cabbage ready to eat. So keep that in mind - you can get the cabbage ready and set it aside while the chana masala cooks, or make it second.
With two people you can make this entire meal in 20 minutes or less.


I'll note the changes I made below, but basically we took Kira's suggestions for things to add to the cabbage. I think there are a lot of possibilities that would work really well. You could also add tofu or a meat, if you felt so inclined.

Chana Masala
From Food alla Puttanesca

Ingredients

1 tbsp vegetable oil
1 small onion, minced
1 clove garlic, minced
2 teaspoons ground cumin
1 teaspoon ground coriander
1/2 teaspoon turmeric
1 teaspoon curry powder
1/4 teaspoon salt
1 large Roma tomato, seeded and chopped
1 15oz can chickpeas, not drained (or about 2 cups cooked beans with liquid)
1 teaspoon fresh ginger

Preparation
Heat the oil in a wide skillet over medium high heat, then add the onion and cook, stirring, until it begins to brown (5-7 minutes)
Stir in the garlic, cumin, coriander, turmeric, and curry powder, and let cook for about a minute. Stir in the tomato and cook, stirring, for 2 minutes.
Add the chickpeas and their liquid, turn the head down to medium, and simmer for about 10 minutes, or until it has thickened slightly. Stir in the fresh ginger, taste and add salt if necessary, then serve.


Five-Minute Indian-Style Cabbage
from Food alla Puttanesca

Ingredients

1/2 head green cabbage, cored and sliced thin
1 tablespoon vegetable oil or ghee (clarified butter), or mustard oil, or more to taste
1 tablespoon black mustard seeds (I forgot these and added 1/4 tsp mustard powder to the other seasonings)
1/2 teaspoon cumin powder
1/2 teaspoon turmeric powder
1/4 teaspoon cayenne pepper
1 teaspoon salt
optional: garlic, ginger, unsweetened shredded coconut, fresh chilis or dried chili flakes, garam masala*
optional garnish: cilantro, lemon juice*

Preparation
Heat a large skillet or wok over a medium-high flame. Add the oil, wait 10 seconds, and immediately add the mustard seeds.
As soon as they start to pop, add the rest of the spices and any optional ingredients and stir-fry for 10 more seconds. Move quickly here so you infuse the flavor in the oil but don't burn them.
Add the cabbage and salt, and stir-fry until crisp-tender or tender, your preference. Taste and adjust seasoning.
Garnish with cilantro and/or lemon juice.


*In terms of optional ingredients, we added garlic, ginger, and dried red pepper flakes. I'm not that into shredded coconut, but I feel like this dish could go a lot of different ways.

6.25.2010

Summer Road Tripstravaganza 2010 - End of the Road


After just over 2,500 miles on the road (and more by plane), the road trip ended.

I pronounce it finish-ed.


We were on the road for so long that the grapes in my parents' yard went from tiny (above) to nearly normal grape-size (below).


I had to tear myself away from the dogs, but we're back in London. Cleaning. Sleeping a lot. Cooking. Reading. Catching up on The Daily Show.


But we'll be back in early August for the my good friend Julia's party in Bloomington.

6.24.2010

Andrew and Alyssa's Wedding

During the last few days of the trip I went to Baltimore for my former roommate Andrew's wedding.


Left to right: Dave, Andrew, Ryan.


Andrew and I were composition students at IU at the same time. I first met him while he lived with the other two pictured above. They were all roommates at 805 S. Henderson, and the address became a way of identifying anyone of the three guys.


Two years later Andrew and I lived together with our friend Sarah in our awesome house in Bloomington.


Andrew at our "Good ol' fashioned pu
mkin carve,"
Halloween, 2007. Typical WVU shirt.


Not sure what the deal is with Andrew's face in this picture, but this is what he looked like when we were roommates - basically the exact same as he's looked since he was 13.


I had such a great time at this wedding. Andrew was nice enough to include me in the rehearsal dinner and then to sushi with the other out-of-town-friends the next day (shown above).


The wedding was at the Baltimore Museum of Art. The ceremony took place in the sculpture garden.


This set of three stones was the "x-factor" of the ceremony, according to Dave, since everyone in the bridal party had to walk across it.


Carla and I went for a walk in the sculpture garden before the wedding started. We ran into Alyssa as she and the bridesmaids were returning from the pre-ceremony photo-shoot.


Alyssa plays flute in the US Army field band. But she sure cleans up nice.


Carla and I had pretty good seats for the wedding, though our line of sight was somewhat obscured by this statue, Mother and Child. Andrew was a little self-conscious about having his older relatives sit right next to it, since from the front it's basically a naked woman with huge boobs.


Alyssa processed to a string quartet piece that Dave composed specifically for the wedding.


They worked a couple of jokes about the WVU-Pitt rivalry into their vows. It was a pretty secular ceremony, and they came up with a lot of meaningful passages to read and recite.


Andrew is vegan and there were vegan options for pretty much everything at the rehearsal dinner and the reception. Unfortunately, I completely forgot to eat any of the cake.


Immediately after the wedding we had cocktails and hors d'oeuvres, and then sat down at the IU table for dinner. Technically I think this was the IU-but-not-in-Alyssa's-army-band table.


I partly forgot to eat dessert because the band started playing immediately and we all went out on the patio to dance.


I managed to take a few awesome pictures of Carla and Dave letting loose.


A little while later they announced that Alyssa was going to toss her bouquet. Carla refused to participate in what she called an "antiquated social construct," so I said to Ryan's girlfriend Suzi that I would go stand in the back with her, if she wanted.


The bouquet came flying toward my face, and I reached up and grabbed it out of the air before it hit me. I asked Carla if this was a sign, since a) I am not terribly coordinated, when it comes to catching things, b) I mostly went over with the group of single girls to show solidarity, and to avoid being shoved into the group by my dude friends.


Andrew and Dave asked if we were going to meet up and do the same thing in Canada next summer, and I said no...not next summer. I hope he doesn't wait until I'm getting married (in ___ years) to come visit me in Canada.

Huber Opera House

The day before we went out to the farm John and I took a really horrible kayaking trip on the Pigeon River. It was basically about 3 hours of paddling as fast as humanly possible to escape the swarms of bugs that followed us on the river. I didn't want to risk losing the camera, so all I have to show for it are the scratches I got from accidentally running my kayak into various trees along the route.


That night we had my former voice teacher Joe over for a chicken dinner.


During dinner he told us about his new favorite recital venue: an old restored opera house in Hicksville (sic), OH. His farm is near the Ohio border and apparently Joe just stumbled upon the place. We decided to go check it out during our visit to the farm.


It was built in the mid-1880s. Touring groups on their way from Chicago to the east coast would stop there and perform their vaudeville acts.


Over the years it's gone through several phases as other things; a silent movie theatre, a "talkies" movie theatre, and then a bar/dance club in the 1980s.


Joe had a recital with his senior students there a year or so ago and struck up a great relationship with the guild of old ladies that's restoring it.


He's having another recital there this year, and staging Mozart's "The Impressario" with three of his high school singers as a fundraiser. The one real problem with the place is their lack of a decent piano. Joe wants to help them start a fund to buy a piano from a place in Fort Wayne that will sell them one at cost.


I can see why he's attracted to the place. It's small enough to seem really intimate, but big enough to have plenty of resonance. I want to come back there next summer and do a recital...though it may depend on the piano situation.


We spent a bunch of time while we were there trying to lower this screen. It was found in the back of the stage during the restoration and was sent to St. Louis for its own repairs.


It's hand painted and signed by the artist. Just like the rest of the place, it's not what I'd expect to find in Hicksville, OH.

6.23.2010

Joe's Farm - or - Count the Animals.

I'm so glad I got to see my former voice teacher, Joe, while in Fort Wayne last week. Joe is one of the most interesting people I know.


("Welcome Friends!! Everyone else stay the hell away.")


I'm not sure where to begin in explaining what he's like, but the photo above may say it for me.


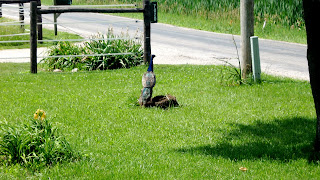
Wesley, the peacock.


I was assigned to Joe as a student when I started taking voice lessons in 9th grade. Back then he lived in one of the worst neighborhoods in Fort Wayne. I think my mom was afraid for me to go over there at night to my lessons.


Since then Joe has moved out to an old house in Amish country, IN, just outside Fort Wayne. And since moving, he's collected quite a group of animals.


Princess Piggy Poo, the terrier that follows him around on the farm.


I should also mention that it's not as if Joe was without animals in his ghetto house. He breeds dogs and canaries, and there were always plenty of them around. He's downsized the dogs over the years, apparently to allow for so many other species (not shown: chickens).


I asked him what this cat's name, since it was also glued to him as we walked around. He sighed and said, "Ugh, his name is...'I-want-to-go-home-with-you.'" The current studio rule is, if you leave the door and a cat gets out, and then it gets knocked up,* you have to take home all the kittens.


Yes, these are miniature horses.


It's important for him to have some rules, since I think he may have close to 100 students. If you ask him how many total students he has, he can't really tell you. I think a few years ago he had 45 sophomores. The numbers fluctuate a lot year to year.


Part of the official reason for our visit was to get some goat's milk so that I could make cheese. He has two goats. The brown one's name is Cinnamon, and he is in love with Joe.


Above is Polly, the pregnant donkey. She's nearly to term. When John asked what would happen when it was "time," Joe patiently explained to us how he would do it himself.


We also took a tour of the barn, where Joe keeps his horse carts. John asked what he did with the miniature horses so Joe showed us the carts that he hooks them up to. John asked where they would drive around, and Joe just said, "You know, around." He also uses the carts to show the horses.

It was pretty clear from John's questions about goat birthing and my irrational fear of feeding the donkey that neither of us has life experience with farms of any kind.


Joe let us feed grass to these horses.


Then one of them went for a roll in the mud.


I'll end here with a word about Joe's low-tech approach to teaching.


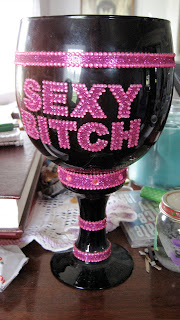
This cup, which I assume was a gift, replaced an old "101 Dalmatians" coffee mug as the place where students deposit their weekly payment for lessons.


*His words.