1.27.2010

Quinoa Stuffed Acorn Squash

I came across an article on thekitchen.com recently about how to get out of the cooking blahs that sometimes accompany all the other blahs at this time of year.


While reading it I realized that John and I are kind of doing one of the things it suggests by trying more vegetarian and vegan recipes. It's prompting us to try ingredients we don't normally use and combinations that I normally wouldn't think of (like tofu and pecans, for example).


Last week we made some squash, stuffed with quinoa, dates, onions, pistachios, and lemon zest. The recipe called for sweet dumpling squash, which we couldn't find, but acorn squash seemed to work fine. This was the first time we've used quinoa, and it was really easy and delicious. This same dish would be delicious with sausage, but it was flavorful and filling this way, too.


Quinoa Stuffed Acorn Squash

from thekitchn.com

3 acorn squashes
1 tablespoon olive oil
1 small onion, diced (about 1/2 cup)
1/4 cup shelled pistachios, coarsely chopped
8 dates, coarsely chopped (about 1/4 cup)
1 teaspoon lemon zest
1 teaspoon cinnamon
1 cup cooked quinoa
Salt and freshly ground black pepper

Preheat oven to 375 F.

Cut squash in half and scoop out seeds. (The seeds can be roasted like pumpkin seeds.)

Place squash face-down in an oiled baking dish. Bake until tender when pierced with a knife, about 30 minutes. Remove squash from oven but keep oven on.

Prepare the stuffing while the squash is baking. Heat oil in a medium saucepan over medium heat. Add onions and sauté until onion is translucent. Add pistachios, dates, lemon zest, and cinnamon and sauté for another minute. Stir in the cooked quinoa and season to taste with salt and pepper.

Turn the squash upright in the baking dish and stuff with the quinoa mixture.

Cover dish with aluminum foil and bake for another 20 minutes.

Serve warm, garnished with extra pistachios or lemon zest, if desired. The peel of sweet dumpling squash is generally tender enough to be eaten.
1.26.2010

Interlochen Chocolate No-Bakes

This is a truly historic event. A joyous occasion. The greatest day in the history of days, as my old roommate Mark would say.


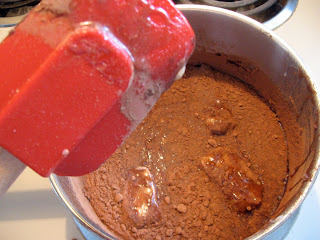
[Another giant spatula picture. They're my new favorite kind of picture].


Let me explain. Seven years ago (yeesh) when I was at Interlochen, I was sustained mostly by bagels, hard boiled eggs, bananas, and the chocolate no bake cookies. They were may favorite, favorite thing the kitchen had to offer. When they were there, I would eat...well, way too many. I loved them, but I didn't really understand what they were. Somehow the flavor combination tripped me and I knew I loved them, but I didn't know why.


Then, a couple of months ago, I found a recipe that I knew would be really similar, and the mystery was explained: chocolate and peanut butter together. Not so profound, but it's maybe my favorite combination of foods, so no wonder I loved them. These tasted amazing. I ate way too many, and I'm going to try not to make them again (though secretly, this recipe was one of the reasons I wanted to buy a big bag of oats in the first place). Turns out, they're really easy to make!


Interlochen Chocolate No-Bakes
from Dinner and Dessert


1/2 cup butter

2 cups sugar

1/2 cup milk

4 tablespoons cocoa

1/2 cup peanut butter

3 to 3 1/2 cups dry quick-cooking oats

2 teaspoons vanilla

Add the first four ingredients into a 4-quart saucepan.

Bring to a rolling boil and hold for 1 minute.

Remove from heat.

Stir in the next 3 ingredients and drop by tablespoons onto wax paper.

Let cool until set.

Cuban Black Bean Soup

Last week John and I made a pork shoulder, and then used some of the leftovers to make pasta with pork and mustard cream sauce (success!). This week, in an effort to keep from wasting food, we used the bone from the shoulder to make this black bean soup, or, "The most amazing black beans I've ever had."


Also, look how photogenic our colander is.


To be fair, I have to give John the credit for this recipe, since he basically made the entire thing while I was in class. I picked the recipe, and washed the beans the night before. Other than that, it was magically done by the time I got home from school on Monday.


It's so incredibly good. I didn't even think black beans were any big deal until I had this soup. Sure, I like them on a taco, they're great in other soups, and maybe it's the magic of the ham bone, but this is a truly great soup. It also made the pork shoulder from last week an even more economic purchase, since we used the bone.
We served this with rice, as suggested below, and half an avocado each (score! This week was the first time we've been able to find decent, affordable avocados in Canada).

Cuban Black Bean Soup
from The Kitchn


1 package of dried black beans - 1 or 2 pounds, your choice
1 onion
1 green bell pepper
3 cloves garlic
1 ham bone or smoked ham hock
1/2 cup olive oil
1/2 cup white vinegar
Salt & pepper to taste


The night before, place beans in a colander and wash them with cold running water. Pick out any rocks or beans that are broken or shriveled. Add the beans to a large soup pot with a lid and cover with enough cold water so that it reaches one inch over the top of the beans.

The next day, drain the water out of the pot and refill with clean cold water an inch off the top. Add the onion and pepper, chopped, to the pot along with the garlic minced or pressed. Add the bone, the olive oil, and the salt and pepper.

Bring to a boil. Skim off any foam, then reduce heat and simmer for 4 to 5 hours, covered, until the beans are soft and the soup is creamy, not watery. It shouldn't get dry and stew-y, but if it does, add a cup or so more water. The consistency should be velvety and it should coat the back of a spoon.

Add the vinegar and simmer for 15 minutes more. The vinegar is the secret ingredient; it makes the soup more creamy and gives it a little "tang."

Serve over rice (optional) and garnish with chopped raw onions and sour cream.

(Canadian) Cottage Cheese Pancakes

I would say these were "strawberry" pancakes, but I wanted to appease John with a fruit-neutral pancake. He was skeptical about cottage cheese pancakes, but he's not anymore!


These were delicious, light, and flavorful pancakes, though they didn't exactly taste like cottage cheese. While I'm easy to please when it comes to Breakfast-for-Dinner night, pancakes aren't usually the direction I take. But these were so good, I'll definitely make them again.


Cottage cheese is one of my favorite things about Canada (along with health insurance, Bulk Barn, and the beaches at the Great Lakes). It's basically the same as in the U.S., but it's...tangier and has a slightly different texture. It's hard to describe, but really delicious.


The recipe came from Closet Cooking. This guy (Canadian!) has some beautiful looking pancake recipes and I intend to try more of them. The recipe originally called for blueberries, and I'm sure they would be great in the pancakes. I served mine with strawberries and syrup on the side, since I'm out of frozen blueberries. I suspect
other types of fruit would also work well.


(Canadian) Cottage Cheese Pancakes
from Closet Cooking


Ingredients:
1 cup flour
1 teaspoon baking powder
1/2 teaspoon baking soda
1/4 teaspoon salt
1/2 teaspoon cinnamon
1/4 cup sugar
1 cup cottage cheese
1/4 cup milk
4 eggs (lightly beaten)
2 tablespoons butter (melted, or oil)
1 teaspoon vanilla extract


Directions:
1. Preheat the oven to 200 F and place a foil lined baking pan in to hold the pancakes as you finish them done.
2. Mix the flour, baking soda, baking powder, salt, cinnamon, and sugar in a large bowl.
3. Mix the cottage cheese, milk, eggs, butter, and vanilla extract in another large bowl.
4. Mix the dry ingredients into the wet.
5. Heat a pan and melt a touch of butter in it.
6. Pour 1/4 cup of the mixture into the pan and cook until the surface starts to bubble and the bottom is golden brown, about 2-3 minutes.
7. Flip the pancake and cook the other side until the bottom is golden brown, about 1-2 minutes.
8. Add to the pan in the oven to keep them warm.

1.23.2010

Caramelized Tofu with Shredded Brussel Sprouts

John and I have been eating a lot of tofu lately, and when I saw this recipe I knew immediately that we would like it. It also seemed like something really different from what we normally eat.


I loved the idea of a shredded brussel sprouts as a "bed" for the tofu, instead of rice or noodles. This meal has a lot of flavor, especially considering how many health benefits it has, too.


The pecans and tofu caramelized perfectly. I wish we hadn't left the tofu in for quite so long, but still, it was delicious. You can use the same pan for both stages, and since it has so few ingredients, it only took about 15 minutes TOTAL to make this. It's a great weeknight meal, and I'll definitely make it again.


Caramelized Tofu with Shredded Brussels Sprouts
from 101 Cookbooks


7 - 8 ounces extra-firm tofu cut into thin 1-inch segments (see photo)
a couple pinches of fine-grain sea salt
a couple splashes of olive or peanut oil
2 medium cloves garlic, minced
1/3 cup pecans, toasted and chopped
3 tablespoons fine-grain natural cane sugar or brown sugar
1/4 cup cilantro, chopped
1/2 lb. brussels sprouts, washed and cut into 1/8-inch wide ribbons


Cook the tofu strips in large hot skillet (or pot) with a bit of salt and a splash of oil. Saute until slightly golden, about 4 minutes. Add the garlic and pecans, and cook for another minute. Stir in sugar. Cook for another couple of minutes. Remove from heat and stir in cilantro. Scrape the tofu out onto a plate and set aside while you cook the brussels sprouts.

In the same pan (no need to wash), add a touch more oil, another pinch of salt, and dial the heat up to medium-high. When the pan is nice and hot stir in the shredded brussels sprouts. Cook for 2 - 3 minutes, stirring a couple times (but not too often) until you get some golden bits, and the rest of the sprouts are bright and delicious.

Rigatoni with Pork Shoulder in Mustard Cream Sauce

Last week John and I finally ate some of the pork shoulder we bought before Christmas. Right after that I came upon this recipe for pork shoulder and mustard cream sauce. Since John and I both love mustard, it seemed perfect.


Just like the original recipe post said, if you don't like mustard, you probably won't like this. Still, the mustard taste isn't overpowering. The thyme goes incredibly well with all the other flavors and makes it taste more like a real recipe than a ham sandwich-as-pasta meal.


We decided to add broccoli and mushrooms to the left overs, which added some more nutritional value. Also, I used half-and-half instead of heavy cream, and it still came out with a great creamy texture. This recipe is ridiculously simple, and I'm pretty sure we'll make it again.


Rigatoni with Pork Shoulder in Mustard Cream Sauce

adapted from The Kitchn.


1 pound rigatoni
1 tablespoon olive oil
1 small to medium yellow onion, sliced
1 cup chicken broth
2 cups cooked, shredded pork shoulder
3/4 cup heavy cream
1/4 cup whole grain mustard
2 teaspoons fresh thyme leaves
salt and pepper

1.5 cups of (lightly) blanched broccoli florets, chopped

1.5 cups of mushrooms, sliced.


Bring a large stock pot of water to boil and salt generously. Add the pasta and cook until al dente. Drain.

While the pasta is cooking, heat the olive oil in a large skillet or sauce pan over medium high heat. Add the onions, season with salt and pepper, and cook until the onions are soft and beginning to brown, about 10 minutes.

Add the chicken broth and simmer for about 3 minutes, scraping up the browned bits from the bottom of the pan. Add the pork, broccoli, and mushrooms, and cook until heated through. Add the cream, mustard, and thyme, and stir to combine. Pour in the drained pasta and toss until everything is coated in the sauce. Season with salt and pepper and serve immediately.

Apple Oatmeal Muffins

Oats, again!


Surprise. Like I said, they're my new favorite thing. One thing I like about them is that they bulk up whatever I'm making. One of these muffins keeps me full longer than a small bowl of cereal. And the apple and cinnamon taste like they were meant to go together.


The yogurt makes them stay really moist. I like that this recipe is measured in both systems, since some things in Canada come in each.


Apple Oatmeal Muffins
from Today's Parent


1cup (250 mL) quick cooking* rolled oats (not instant)
1cup (250 mL) plain yogurt
1egg
1/3cup (75 mL) brown sugar
¼cup (50 mL) vegetable oil
1cup (250 mL) all-purpose flour
2tsp (10 mL) baking powder
½tsp (2 mL) baking soda
1cup (250 mL) chopped apples (peeled or not ý your choice)
2tbsp (20 mL) sugar
¼tsp (1 mL) cinnamon


1.Preheat the oven to 400°F (200°C). Grease a muffin pan or line with paper liners.
2.In a bowl, stir together the rolled oats and the yogurt. Let soak for 10 minutes or so, then stir in the egg, brown sugar, and vegetable oil.
3.In another bowl, stir together the flour, baking powder, and baking soda. Add this mixture to the oat mixture, and stir just until combined. The batter will be quite thick ý but thatýs OK. Stir in the chopped apples. Spoon batter into 8 to 10 cups of the prepared muffin pan, filling the cups all the way to the top. In a small bowl, stir together the sugar and the cinnamon. Sprinkle over top of the unbaked muffins.
4.Place in the oven and bake for 18 to 20 minutes, or until nicely browned on top and a toothpick poked into the center of a muffin comes out clean. Let cool for a minute or two before removing from the pan.

*Mine were not quick cooking, and it worked fine.

Scottish Oat Scones

You may remember that during the fall my favorite ingredient was sweet potato. I think I've embraced winter by finding a new favorite - rolled oats.


It's not because I love eating them plain, but it's because of how well they bake into things. I initially bought the big bag of oats so I could experiment with making granola, but then I realized how many other things I can do with them.


Starting with: scones.


I searched around for a scone recipe that didn't involve heavy cream (since I'm out) and settled on the one here. I left out the dried currants, and they still came out really well. These didn't have the typical scone texture, but they were really filling and good. And the oats kind of made them seem less like dessert-for-breakfast.


Scottish* Oat Scones
from Allrecipes.


  • 1 1/2 cups all-purpose flour
  • 2 cups rolled oats
  • 1/4 cup white sugar
  • 4 teaspoons baking powder
  • 1/2 teaspoon salt
  • 1/2 cup dried currants**
  • 1 egg, beaten
  • 1/2 cup butter, melted
  • 1/3 cup milk

Directions

  1. Preheat the oven to 425 degrees F (220 degrees C). Lightly grease a baking sheet.
  2. In a large bowl, mix the flour, oats, sugar, baking powder, salt, and currants. Make a well in the center. In a small bowl, beat egg until frothy, and stir in melted butter and milk. Pour into the well, and mix to create a soft dough. Pat dough into two 1/2 inch thick circles. Place on the prepared baking sheet. Score 8 wedges into each circle of dough.
  3. Bake 15 minutes in the preheated oven, until risen and browned. Split wedges, and serve warm.


*What makes them Scottish? I have no idea. Do you know?
**I omitted.

1.20.2010

Thai Curry Soup with Tofu

I love getting experience cooking with Asian ingredients. In our quest to find more vegetarian meals, John and I have been eating a lot more Thai-style soup in general, and it really brightens up my week.


This originally called for chicken but we made it with tofu. That's partially out of a desire to eat less meat, and also because chicken is way more expensive in Canada. If chicken breasts cost $10 or $11 and tofu costs $2 or less, it usually works its way into our cart.
This soup is incredibly good. We probably would have tried to eat it all the night we made it, but it makes enough for a couple days of delicious left overs. And like a lot of curry-themed foods, this only gets better with more time in the fridge.
The recipe I used called for rice sticks, but we upped that to vermicelli noodles and they went really well with it. I would definitely make this soup again, hopefully very soon.


I'll give you a link to the recipe on another blog.

Click here!

If you have trouble using it, please email me at soundslikecanada at gmail dot com - I'll make sure the recipe finds its way to you.

1.18.2010

Almond and Blueberry Granola, and Parfait

This week I was inspired by my friend Marty's facebook status to try making my own granola. Part my reasoning is that cereal is expensive and I eat a ton of it. I'm sort of experimenting with an alternative.


I just realized that the depth in this picture is strange - that spatula looks huge!


Anyways, I searched around the internet for a homemade granola recipe I liked and eventually adapted one to suit me. It turned out pretty well, but I've started to realize that my oven is faster than I expect it to be. The recipe called for this to bake for 30-45 minutes, and I should have taken them out after 25 or 30 max. Instead I left them in for 35 or so and they were a little too done. Still, it was tasty and makes for a good snack. For lunch I used it in a parfait with plain yogurt and frozen strawberries.


I want to try adding other things, but in general, I think I'm a fan of homemade granola.


Granola with Almonds and Blueberries
adapted from Joy of Baking

3 cups of old fashioned rolled oats
3/4 cup sliced or slivered almonds (I chopped them)
1/2 tbs ground cinnamon
1/4 tsp salt
2 tbs canola oil
1/2 cup maple syrup
3/4 cup dried blueberries

Preheat oven to 325 degrees F. Combine the oats, almonds, cinnamon, and salt in a bowl. Separately, combine the oil and syrup. Pour the wet ingredients over the dry ingredients and stir to combine. Spread the mixture evenly on a greased or parchment lined baking sheet. Bake for 25 minutes (or more, depending on your oven). Use a spatula to slide the granola off the baking sheet and into a bowl. Add dried blueberries and stir to combine.
Serve with milk, as a cereal, or with yogurt and other fruit, or simply munch on it.

Buttermilk Biscuit Sandwiches

Twice now I've made the buttermilk biscuit recipe from Pioneer Woman's new cookbook.


Her biscuits are pretty good, but I think instead of posting the recipe for them, I'm going to show you what happened to a couple of the left overs. Any biscuit recipe would probably do just fine with these.


One of the things I miss from America is the McDonald's menu. I know how that sounds - but let me finish. McDonald's is a place I only go when times are tough, and/or, I'm on a road trip that left before dawn. And when I go there in those times, I'm comforted by certain things - notably, the biscuit breakfast sandwiches. They don't have them in Canada - no one even knows what I mean when I try to describe them as things that you can get at McDonald's.


This weekend I tried to recreate them with my left over biscuits. I cracked eggs into ramekins and added a little shredded cheese that we had on hand. The ramekins are in a pan with about a 1/2 inch of water.


The left over biscuits, separated, spent about 30 seconds in the microwave while the eggs were cooking. I believe I cooked them at 325 degrees F for 20 minutes (they were fully cooked, with a little yellowish yolk).


We added spinach to two of them, though it only superficially made them "healthier." Still, they were really filling and came together easily.
Buttermilk Breakfast Sandwiches

1-2 eggs per person
1-2 biscuits per person
1/4 cup shredded cheddar cheese
Salt and pepper to taste
Spinach (optional)


Butter ramekins for each of the eggs. Break one egg into each, sprinkle with cheese, salt, and pepper. Place ramekins in a baking dish or pan with a 1/2 inch of water.* Bake for 10-20 minutes at 350 degrees F. Using a fork or knife, coax the cooked eggs out of the ramekins and place on the biscuits.


*This was kind of an experiment. Does it actually make a difference? You tell me.

Mustangs Hockey


A couple of weeks ago there was an announcement that if you wore purple clothes/Western gear to the hockey game, you got in for free.


John and I figured it was a good chance for us to see what the hockey games were like without having to pay. We got there a little late and sat on the "away" side (though it was sort of also the Western spill over side) of the arena. On the walk over there we got to stand right up next to the glass, so I snapped a couple of pictures.


This is a picture of the pep band. At the hockey game.


Our purple scarves that my mom knitted don't look so purple here, but they were our ticket in.


The little girl in the striped shirt just punched our mascot (Westy? Musty?) in the nose.


Then another little boy attacked him. It's a thankless job, being a mascot. Of course, by the time he came over to us, my camera batteries had died.


The game was kind of a slaughter. Western scored three goals in about 5 minutes during the second period. The score was 8-2, Western, when we left during the third period.


We decided to spend part of the third period in the beer garden (!), where you can sit right next to the goalie.


We got to see Western's awesome goalie perform some generally badass saves.


Since we each bought a Sleeman beer, we got to be in a drawing to win a Sleeman chalk board/bar sign (alas, didn't happen). I got one of the second place prizes - a t-shirt and a hat!


[That would be the swell Sleeman hat.]


A pretty good deal - hockey game, a beer, a t-shirt, and a hat for $5!

1.16.2010

PW's Skillet Cornbread

I spent my Barnes and Noble gift cards this Christmas on a nerdy thing (the Cambridge History of Western Music Theory) and a kitcheny thing - The Pioneer Woman Cooks.


As she admits, her recipes are fairly high-calorie. It's all about portion size and balance, but I'm a bit hesitant when her recipes call for cream or a fryer. I love her cookbook. It has all the charm of her blog, and lots of pictures.


John was delighted by how many of his favorite Southern food recipes were in the book - particularly Chicken Fried Steak ("WE HAVE TO MAKE THIS IMMEDIATELY!"*). We agreed that, as a contrast to our streak of vegan and vegetarian meals, we would make chicken fried steak, corn bread, black eyed peas, and either greens or green beans. That meal hasn't materialized yet, but I have made the corn bread from PW's book twice now, and each time it's been outstanding. As in, the best cornbread ever.


Thanks, in no small part, to the cast iron skillet that our friends, Carla and Dave, gave us for Christmas. My mom also gave me her old, even bigger one, so at some point I intend to double the recipe and make a ginormous batch of cornbread - you know, if we're having people over.**


After making the corn bread from Joy of Cooking and comparing it to PW's, I think hers is SO much better. And I think the difference is butter. I also like her method, of cooking it in the skillet for a minute on the stove top before putting it in the oven. It makes for a crispy outside and a moist inside.


PW's Skillet Cornbread
from Pioneer Woman Cooks

1 cup yellow cornmeal
1/2 cup all purpose flour
1 tsp salt
1 tbs baking powder
1 cup buttermilk***
1/2 cup milk
1 egg
1/2 tsp baking soda
1/4 cup plus 2 tbs shortening (I used butter).


Preheat oven to 450 degrees F. In a bowl, combine the cornmeal, flour, salt, and baking powder.
Measure the buttermilk and milk in a measuring cup and add the egg. Stir together.
Add the baking soda to the egg and milk mixture.
Pour the milk and egg mixture into the dry ingredients and stir gently with a fork, just until combined.
In a small bowl, melt the 1/4 cup shortening in the microwave. Slowly add the melted shortening to the batter, stirring until combined.
In an iron skillet over high heat, melt the remaining shortening. Pour the batter into the hot skillet and cook for one minute. Bake in the oven for 20-25 minutes (mine usually is perfect after 22 minutes), or until golden brown. The edges should be crispy.


*As soon as I can find the right kind of meat, I will. Oh, Canada.


**Or if we're not.

YakTrax

Last summer, I sprained my ankle as I was walking out of the door to my kitchen. I was running regularly at the time and it was a huge bummer. That's part of the reason I was swimming so much during the fall semester. I needed some way to exercise that was ankle-safe.

Then the buses went on strike and I walked 30 minutes to school and then 30 more back home. The walk was annoying, at times, but it actually helped my ankle heal and get stronger.

So this semester I'm running again. It's really like 80% walking at this point, as I gradually phase in more and more running. But it feels good!

The reason I'm telling you this is to show you my YakTrax.


No, that's not a small animal trap. It's a pair of folded up YakTrax, which are like rubber and metal attachments that runners up north put on their shoes. They give you traction. It's kind of a miracle...on ice...(oops, that's something else).


They fit like so. I was kind of nervous about how they would do at first. Since my routine right now is mostly walking, I got to try them out without as much risk before I started to run. They still aren't that helpful in the slush, but on a well plowed road, they do really well.


They came with a bonus pair of hand warmers. I plan on saving them until I either go ice skating outside or run a 5k in the winter (next winter, of course).